HowToUseTiledToCreateStendhalMaps
How to Use Tiled
Tiled is a tile editor that supports layers and different tilesets. You can download the latest version at http://www.mapeditor.org/.
If you don't have the map files from Stendhal already, please follow these instructions to setup a development environment with the latest source code and map files: Stendhal on Eclipse
How to create a new map
TODO: update these screenshots to the most recent version of Tiled
Before you create a new map, I suggest, that you open some existing maps and look around how they are built. And there are many places in Stendhal already, that could use some improvements or additions.
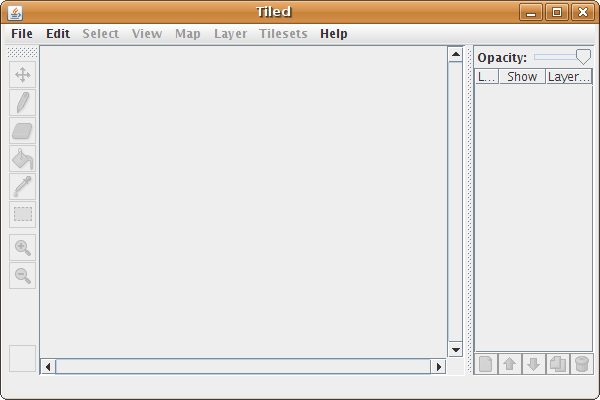
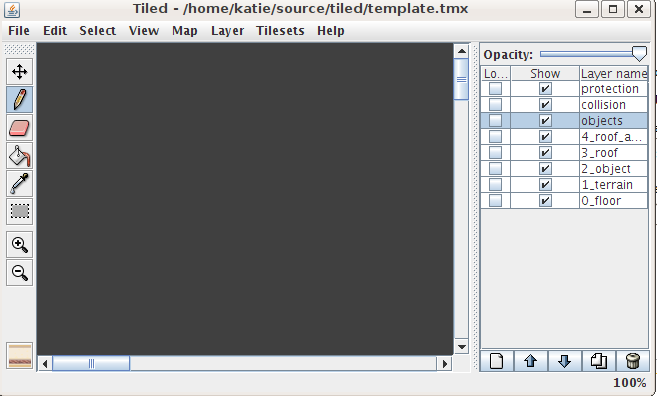
Figure 1: The Tiled map editor
First you need to load the template.tmx map file and resize the map to the desired size.
Click on File and now choose Open, find where you extracted the stendhal_mapeditor-2.00.zip find template.tmx and click Open
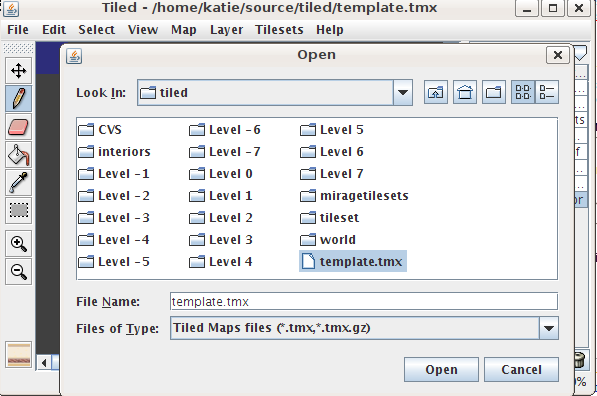
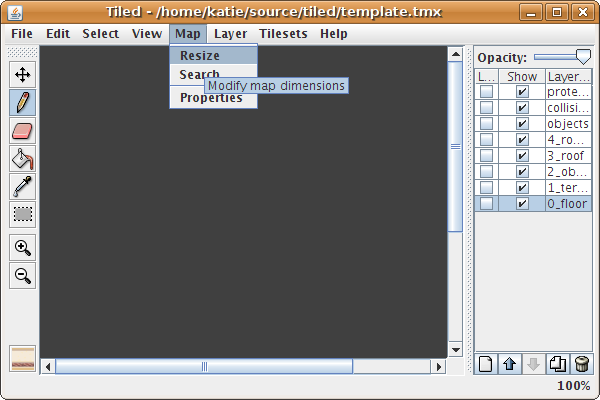
Figure 2: How to open the template map
We are going to work on a 64x64 (64 tiles by 64 tiles) map. First make sure all layers are visible, before you resize. Do this using the 'Show' tick boxes in the dialog at the side panel.
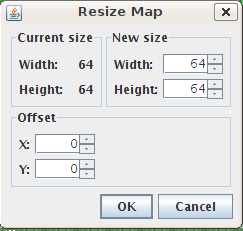
Then click on Map and choose Resize. Note, a 64x64 map is not big (it will take a player around 40 seconds to move from one end to the other) but it is big enough for our example.
As you see in the resize dialog you can resize the map and even position the current map at any point in the new map size. Hence you can always resize your map later. Make sure all layers are visible before you resize any map.
Don't change the layer names from:
- protection
- collision
- objects
- 4_roof_add
- 3_roof
- 2_object
- 1_terrain
- 0_floor
etc etc seen on the template file.
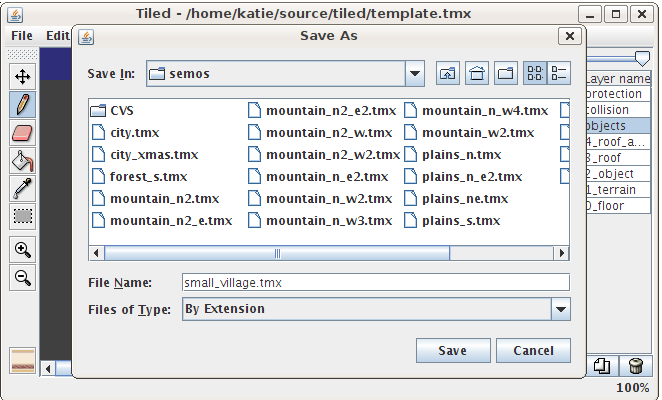
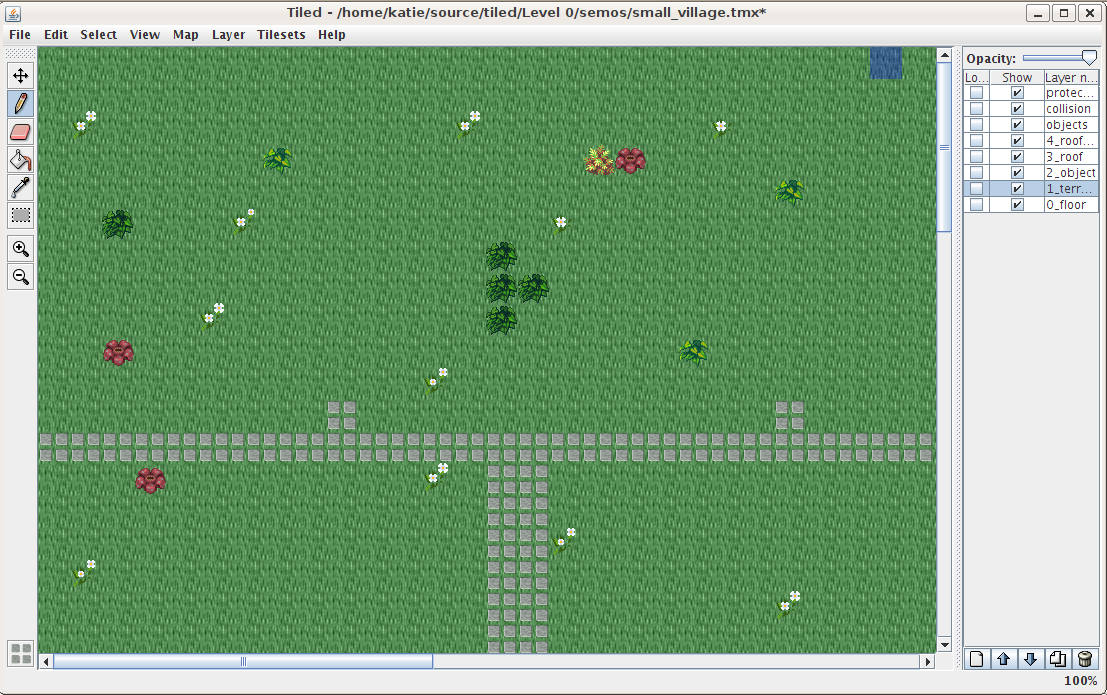
Now save this map as Level 0/semos/small_village.tmx by clicking on File and choosing Save as....
Note: You need to type the complete name with the extension .tmx.
Tilesets
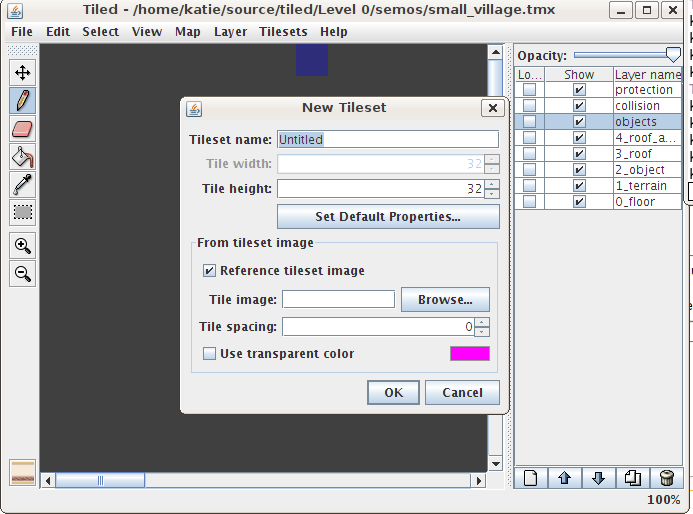
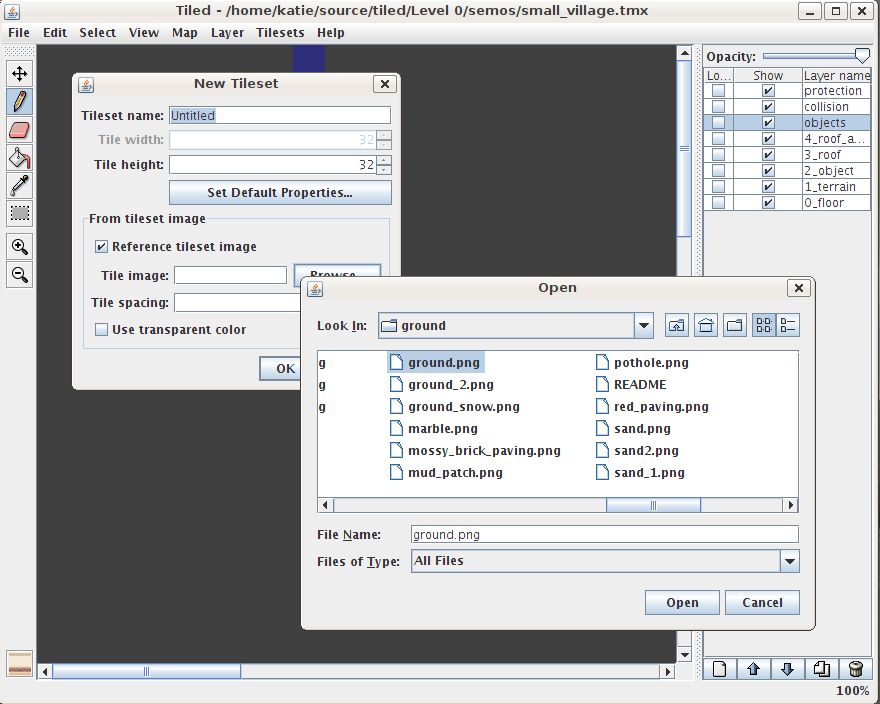
The map template.tmx doesn't come with any tilesets preloaded. To load a tileset, click on Tilesets and choose New Tileset .... Now tick the box next to Reference tileset image ... and Click on the Browse button. This lets you choose your tileset image. They are all located in the tiled/tileset/ folder.
Finding what you want should be easy as the tilesets are split into folders depending on what they are used for:
- building
- window
- column
- decoration
- door
- entrance
- fence
- roof
- stairs
- wall
- window
- ground
- fire
- ice
- indoor
- ladder
- ridge
- rock
- water
- item
- armor
- banner
- candle
- chemistry
- chest
- corpse
- drink
- food
- furniture
- bathroom bed carpet chair clock crockery curtain light other picture shelve sink statue table
- gothic
- pot
- statue
- textile
- weapon
- logic
- creature
- item
- object (for larger items that don't belong anywhere else)
- plant
- bush
- flower
- indoor
- stump
- tree
- sky
- cloud
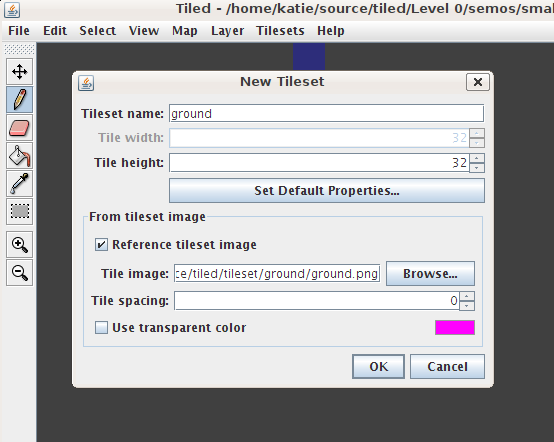
We are going to need grass, so we go to tileset/ground and select ground.png
Any image not in tileset/ shouldn't be used. If you want to you can fill in a Tileset name to help you find it later. You can leave everything else as it is. Then click 'Ok' and your tileset is ready to use!
Click on the square in the bottom left corner of the Tiled application to bring up the palette chooser. There's more on this later, so read on ...
Layers
The map layers must not be renamed and must all exist, apart from 4_roof_add which is optional. However, any of the layers can be empty.
These five layers are the ones that host the game graphics:
- 0_floor
- 0_floor_parallax (optional alternate floor layer for clients that support parallax backgrounds)
- 1_terrain
- 2_objects
- 3_roof
- 4_roof_add (optional layer)
The logic layers
- objects
- collision
- protection
are special. The objects layer must ONLY contain tiles from objects tileset (like monsters and food) NOT other graphics. The collision tileset uses ONLY the red square in the collisions tileset and the proection layer uses the green square from the collision tileset.
The draw order is:
- 0_floor
- 1_terrain
- 2_objects
- object and sprites like players, monsters, etc... sorted from lowest y, lowest x
- 3_roof
- 4_roof_add
This basically means that any objects closer to the bottom of the screen, ie the foreground in our pseudo 3D world will be on top of other objects, and roof and roof add will be above everything.
Ok, now let's edit.
Editing the map
Choose the 0_floor Layer.
Our village is going to be a rich one, so let's look for a nice ground tile for it.
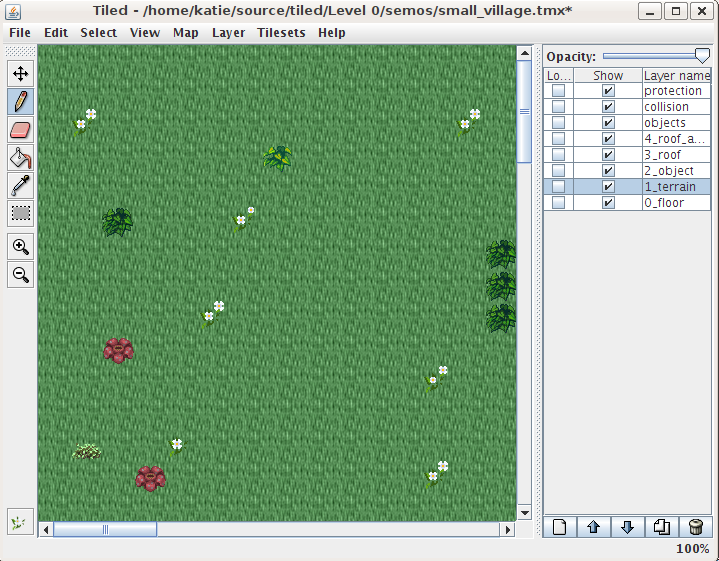
Click on Fill and fill the floor with your chosen tile.
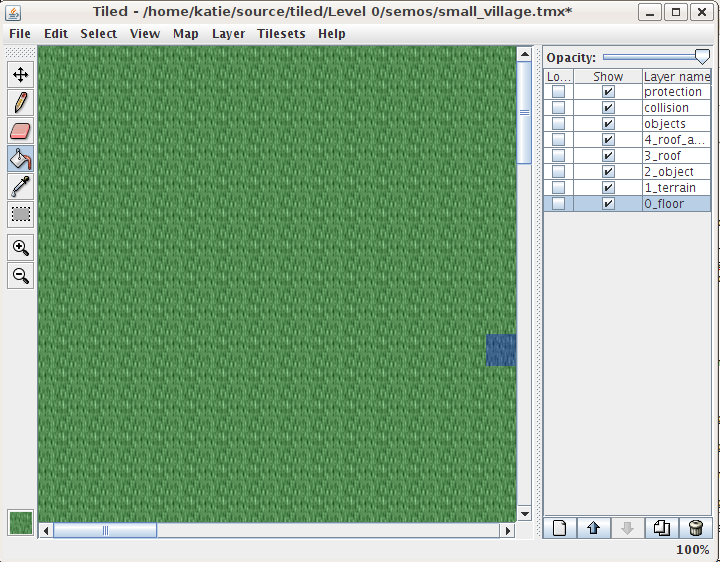
Figure 7: The ground on the floor layer
Ok, but the map still looks too simple.
So now let's add some details to the terrain layer (flowers, and bushes). We need to load those tiles, so repeat the steps to load ground tiles, but look for tileset/plant/bush/bushes.png and tileset/plant/flower/daisy_white.png.
Make sure you choose 1_terrain layer.
Then in the bottom left hand corner you will see a small square with a tile in it. Click this and a tile selecter dialog will open. On the right you will see the available Tilesets for Stendhal and on the left all the tiles. Tip: if you drag the pallet out and make it bigger you can eventually get all the like tiles to align (so for example the tiles that make up a tree will all be together) and it will make your life a lot easier!
Dot some bushes and flowers around
We need a path, so we add tileset/ground/green_paving_3.png to our palette, and draw one on the 1_terrain later. We change to the 2_object layer now (or terrain is ok too) to add tombs to the graveyard.
Now let's add houses and a tree to our village. As you can see adding elements isn't hard, you simply must flip between layers.
And now for the tree. Trees are a bit more complex than houses because they are split over two layers: 1 and 2.
Make sure that the upper part of the tree is always on either 3_roof or 4_roof_add. This will mean it is drawn over player when they stand 'behind' it.
First we add tileset/plant/tree/spruce.png, and then draw the lower part of it to the 1_terrain layer.
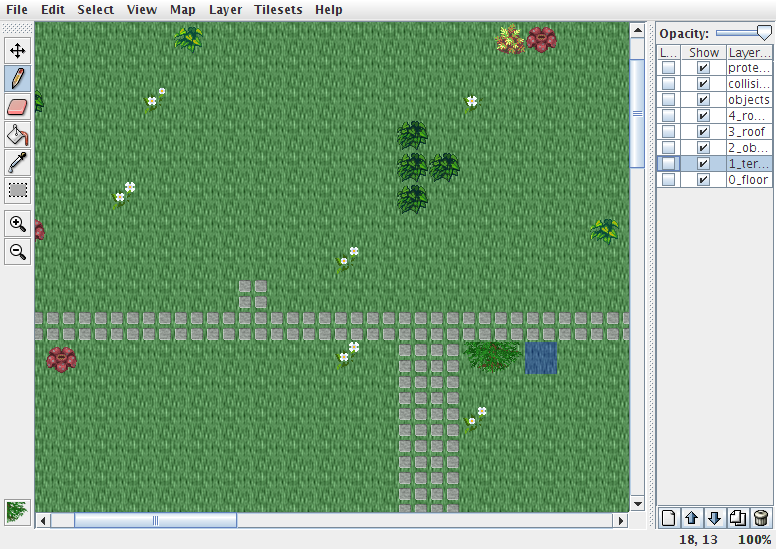
Figure 10: The foot of the tree on the terrain layer
Now switch to the roof layer. The roof layer is for objects that are drawn on top of players and creatures in the game.
Draw the upper part of the tree on roof layer.
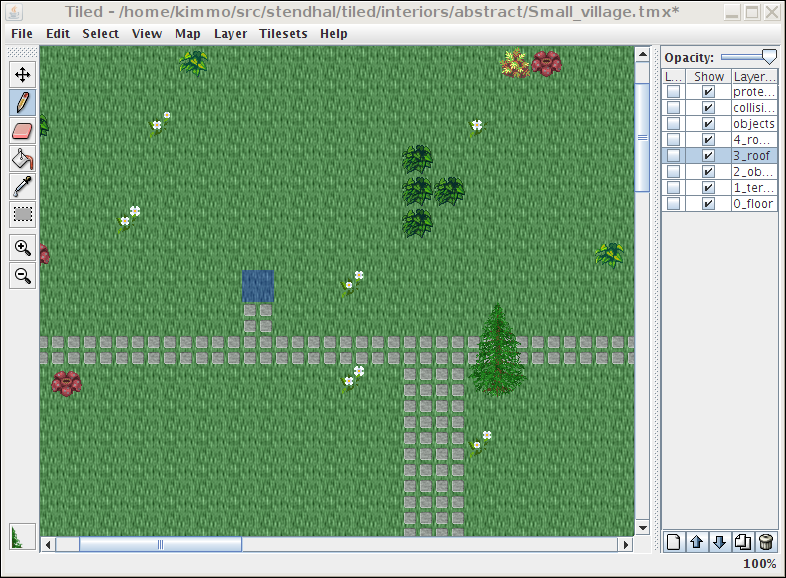
Figure 11: The upper part of the tree on the roof layer
Let's practice this. Let's add another tree.
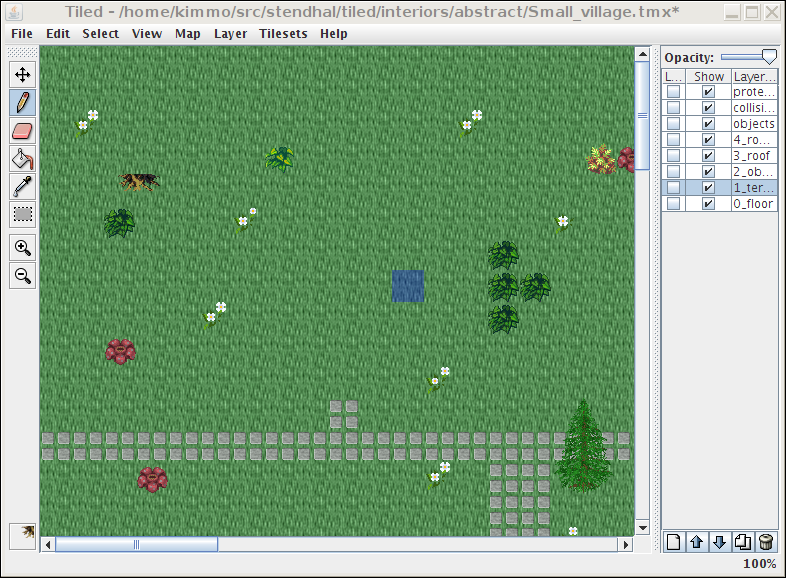
Figure 12: The bottom of our second tree
Remember how to deal with two layers? Make sure the top of the tree is on the roof layer.
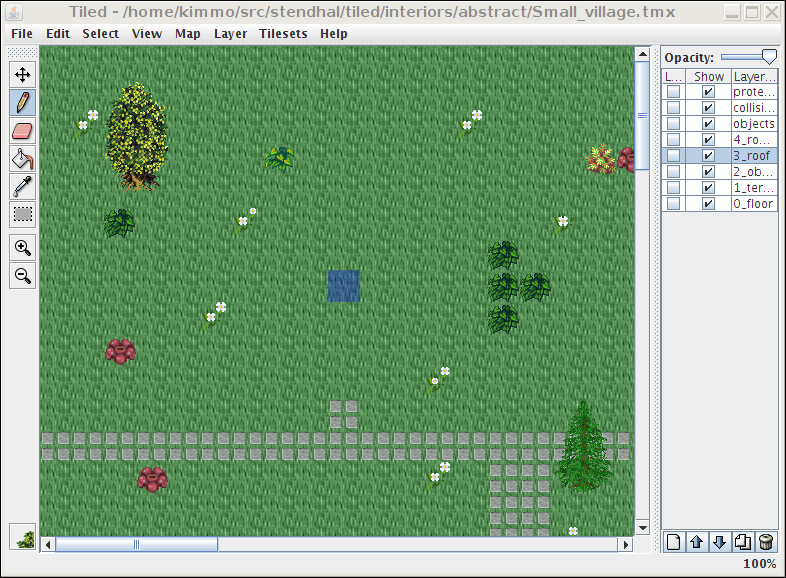
Figure 13: The Top of our second tree
A village would not be much of a village without houses. Let's draw one. Start with the wall.
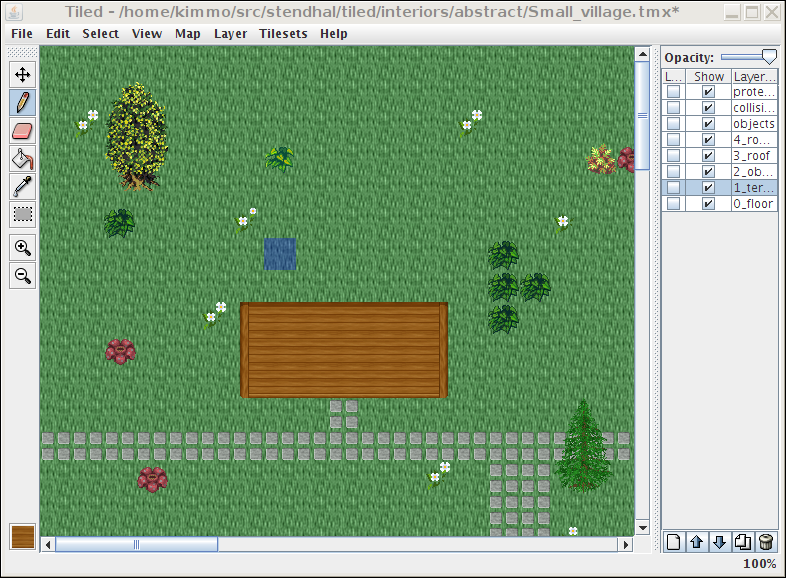
Figure 14: The start of a house - a wall
The wall was drawn on terrain this time, so we can add some decorations to 2_object to make it a bit more interesting.
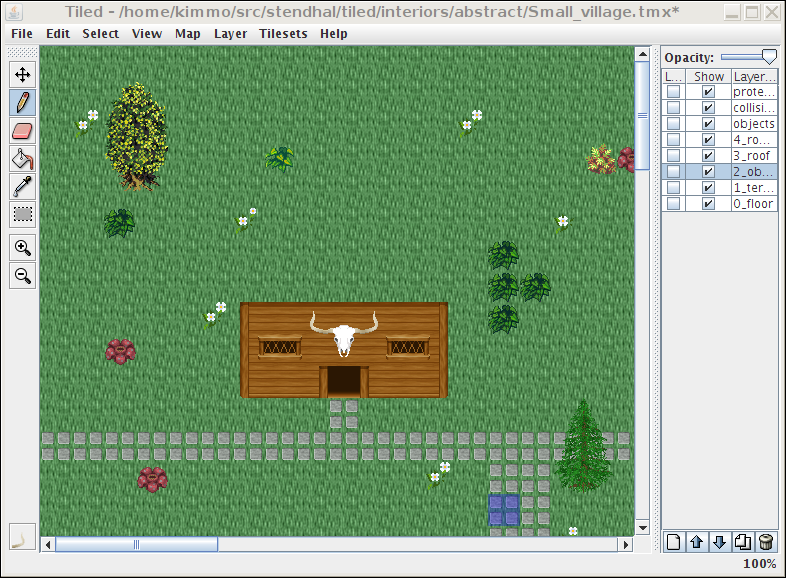
Figure 15: Wall decorations added
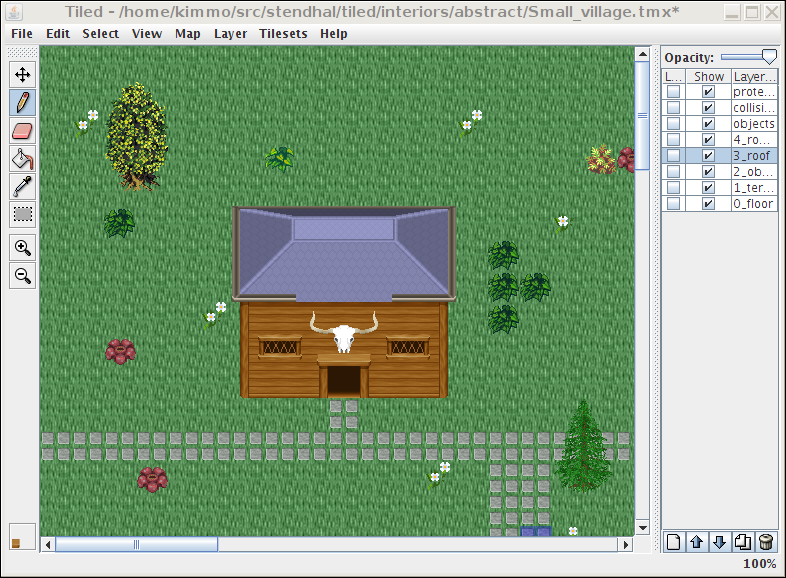
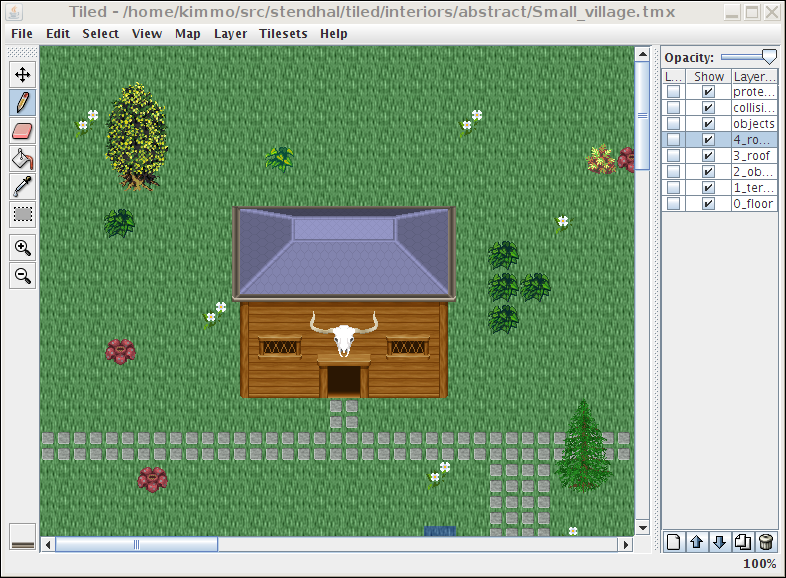
The roof can be drawn on 3_roof, so that a player walking behind the house will be covered by it. For our map we also add the top of the door there, as the window borders already used the space in 2_object.
The front of the blue roof does not have a border like the rest of it. Also we have another problem: the longhorn skull got partially covered by the door top. Fortunately there is one more map layer remaining. So we draw the missing border to 4_roof_add, and move the skull there too.
Still there? Good, now let's add lots of details to make a good map!
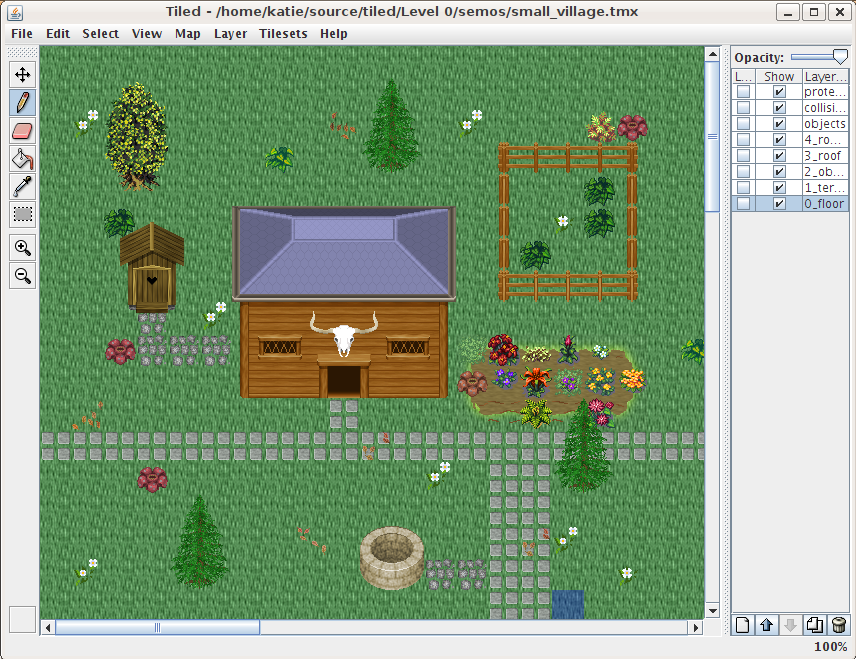
Figure 18: The map with more details
Complete the map yourself :)
Finally we need to add two more important things:
- Objects (Entities, active game objects, this includes portals, signs, NPCs etc)
- Collision
- Protection (to define non pvp areas)
The collision layer determines what is passable and what is not.
You need to add the new tileset tileset/logic/collision.png and in then choose the red square. To define what cannot be travelled over draw a red square in the Collision layer on each non passable tile. It is helpful to drag the opacity of this collision layer to about 30%.
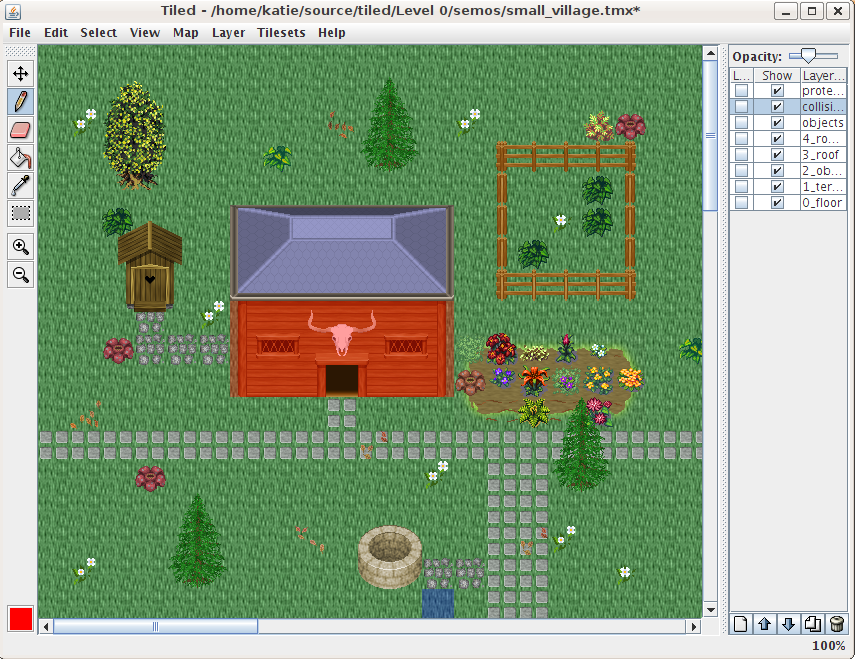
Figure 19: Collision Tile selected and we have marked the house
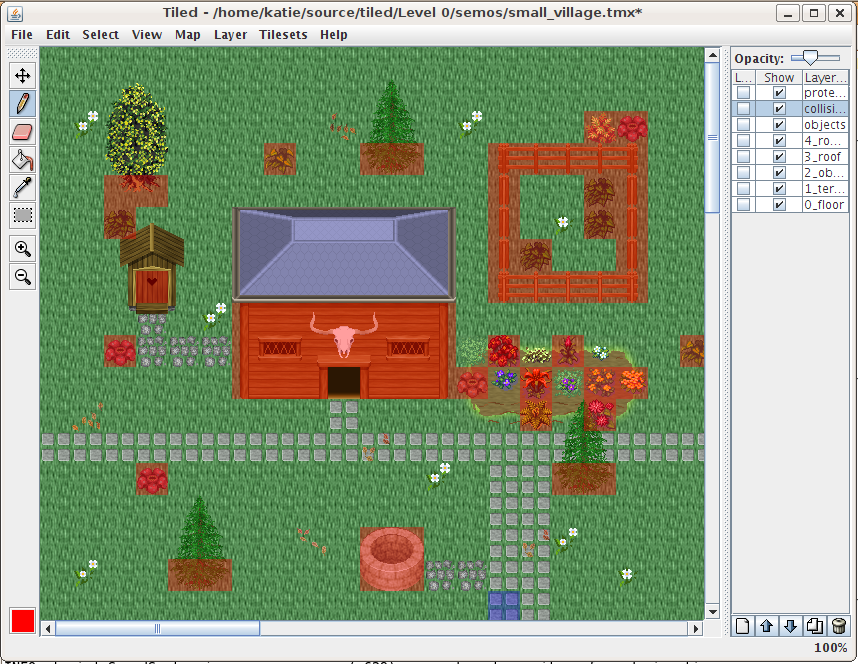
Figure 20: The completed collision map
Once you have completed this we have to add objects that are real entities in the Stendhal server. Things like NPCs, some portals, creatures and so on ... Notice what layer we are working on. To add monsters, select them from tileset/logic/creature/ in the objects layer.
We'll add some sheep, sheep food, and a couple of chickens.
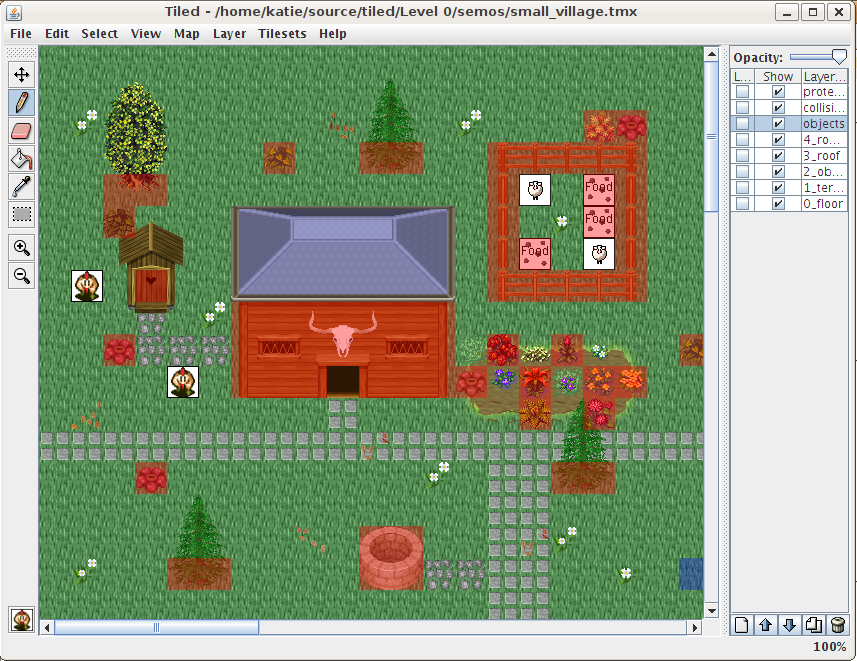
Figure 21: The active objects have been added and can been seen in white
We want to make the whole area protected, to we add the tileset tileset/logic/protection.png and fill on the protection layer
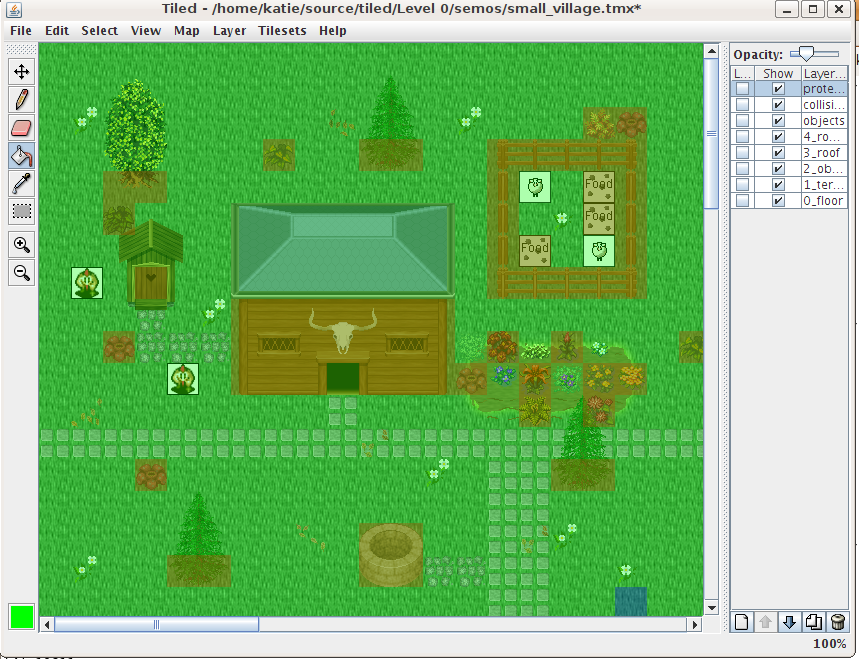
Figure 22: The finished map with the protection layer.
And you are done! :)
Now, go build your own maps.
Please note that, if during your work you find that some important tiles are missing please create the tile and send it to us so that everyone get it and can see your tile.
Some suggestions when making interiors maps
Please if you are going to create maps for Stendhal, follow these simple guidelines:
- The walls have two tiles. The main and the bricks. The bricks goes inside.
- Put a black space between rooms like in semos hall
- On buildings Look from outside the building. If it's wide and small for example 10 tiles width and 5 height, make the interior wide and smallX2 like close to 20X10
- If you enter the map from the south, make the door of the interior also at the south, etc.
- When you put the portals in for new levels, interiors need only the plain white tile saying 'Portal' (even if you are going upstairs). This is because all interior portals are coded by hand so they need the plain white one, not an arrow pointing up or down.
- To help you understand and to have similar approach, take a look on similar dungeons, outside houses or interiors
Parallax Background Support
A parallax background is an image that scrolls at a different rate relative to normal map layers. It is drawn under map layers and visible where tile image data is not used (fully transparent through all layers). The image can be specified in a zone's XML config using the attribute name "parallax" (example: 6_kikareukin_islands). The value should be a path relative the data/maps/parallax directory. For example, the value "semos_surrounds" would tell the client to use the image data/maps/parallax/semos_surrounds.png.
However, when adding parallax backgrounds to maps, there are some things to consider for maintaining backward compatibility with the classic Java client. Transparent areas in a map will simply be black in the Java client. So, unless specifically desired, map data should not contain fully transparent areas. But there are two methods that can be used to instruct supporting clients on where to draw transparency on the map:
- You can specify tilesets to be ignored by the client when building map data. Use the attribute "parallax_ignore_tiles" in the zone's XML config. An example of how to do so can be found in the configuration of 7_kikareukin_clouds. Multiple tilesets can be defined using a comma-delimited value (example: image1,image2,...).
- An additional layer named "0_floor_parallax" can be added the TMX map file. The layer should be identical to "0_floor" excluding the portions that should be transparent. An example of how this is done can be found in map of 6_kikareukin_islands (Tiled Map Editor needed to view).
How to use the map in Stendhal
To add the map to Stendhal you need to code a bit of XML, but don't worry. It is simple!.
Add the zone to data/conf/zones.xml as explained in How to add new maps to server
Finally if you want to fine tunning the map by adding NPC, or something else, just create a new file name base name of your map.java ( in our example that is your area ) and edit it. See other files on the same folder to know how to do it, and more explanation in How to add new maps to server
Trouble shooting
- If you are submitting this for inclusion in the game, please edit the path for the tilesets so it is correct. usually "../../tileset/XX/YY.png". It is easiest to do this by opening the .tmx file in a text editor.
- Tiled will only resize visible layers. If you want to resize a map, make sure all layers are visible (the tick box 'Show' is selected) before you resize. But don't worry, if you forget to do this, you can open the .tmx file in a text editor and manually change the sizes of the layers which have been missed out.
Danter Has made an extended tutorial, that focuses on changes made to the stendhal map format and a few techniques he uses, check that out aswell:
How To Use Tiled To Create Stendhal Maps: Continued
